
In the age of paranoia, border checks are becoming increasingly intense for innocent citizens. Here’s a guide on how to hide computer files for border crossings, to save you time and unnecessary scrutiny.
Hiding files from officials sounds pretty suspicious, I know.
But never fear—I’m not a terrorist (I promise, NSA), I don’t smuggle contraband, and aside from sneaking into Iran, I’m generally solid citizen when it comes to following rules. So why hide my files?
Because it saves a lot of time and a lot of pointless hassle.
In many countries run by the military—and now the United States, thanks to everyone’s favorite orange dotard—border checks can be incredibly thorough and time consuming.
Guards can sift through every article of clothing, flick through every mobile photo, and go through every. single. file. on your computer. When crossing from Uzbekistan into Afghanistan, an Uzbek border guard made me delete all of my Uzbekistan photos (that he could find, heh heh heh) simply because I had this photo:

The problem: you see the tiny man in the photo? No, not the guy in red. The barely visible man in turquoise to his right.
Yeah, that’s a guard. According to Uzbekistan’s rules, absolutely no photos of military or police personnel are allowed EVAR. This seems like the most trivial violation of that rule, but border guards are mindless drones, hired and placed based on their ability to follow orders without question.
If I hadn’t hidden my photo files, I would’ve lost several weeks of photos, thanks to the guards lurking around every corner of Uzbekistan’s tourist attractions. I also would’ve had to sit while the guard went through all of my Uzbekistan photos… all 150GB of them.
Thanks, but no thanks.
How to hide computer files for border crossings
For Mac users
For Windows users
For Linux users
- You know how to already, I’m sure.

Bonding with my computer during Christmas in Goa because I just can’t resist.
How to hide files on a Mac
Hiding files on a Mac isn’t too hard, but you will have to use the Terminal. For those less tech savvy folks, that’s the little program where you type in commands for the computer to do, hacker style. But never fear! It’s less complicated than it looks.
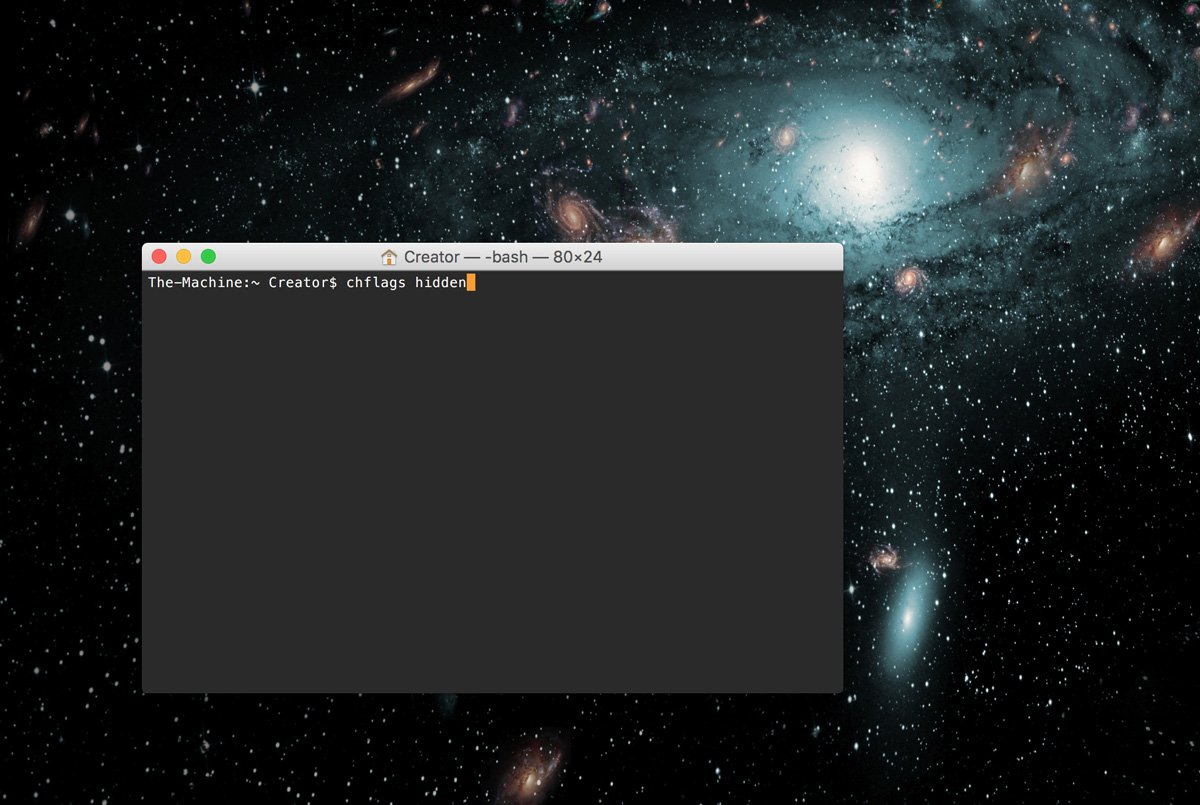
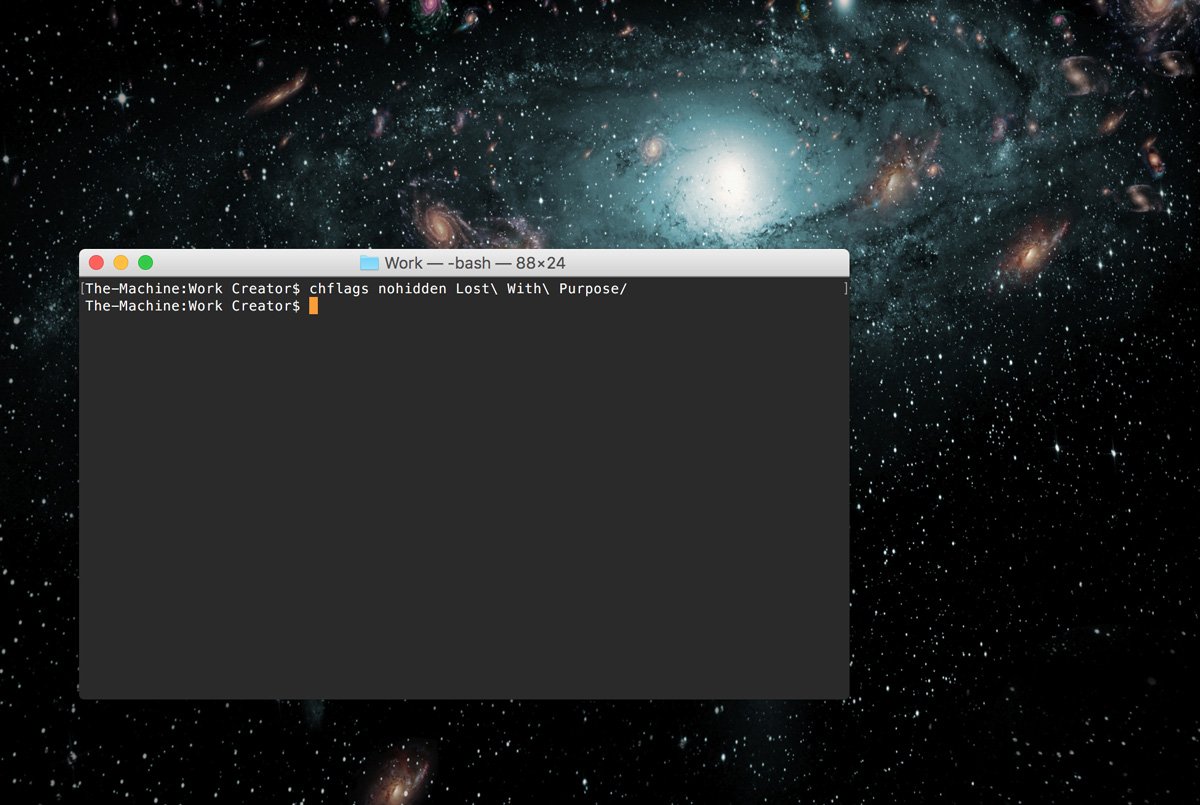
1. Open up the Terminal application, and type in the command chflags hidden with a space after “hidden”.
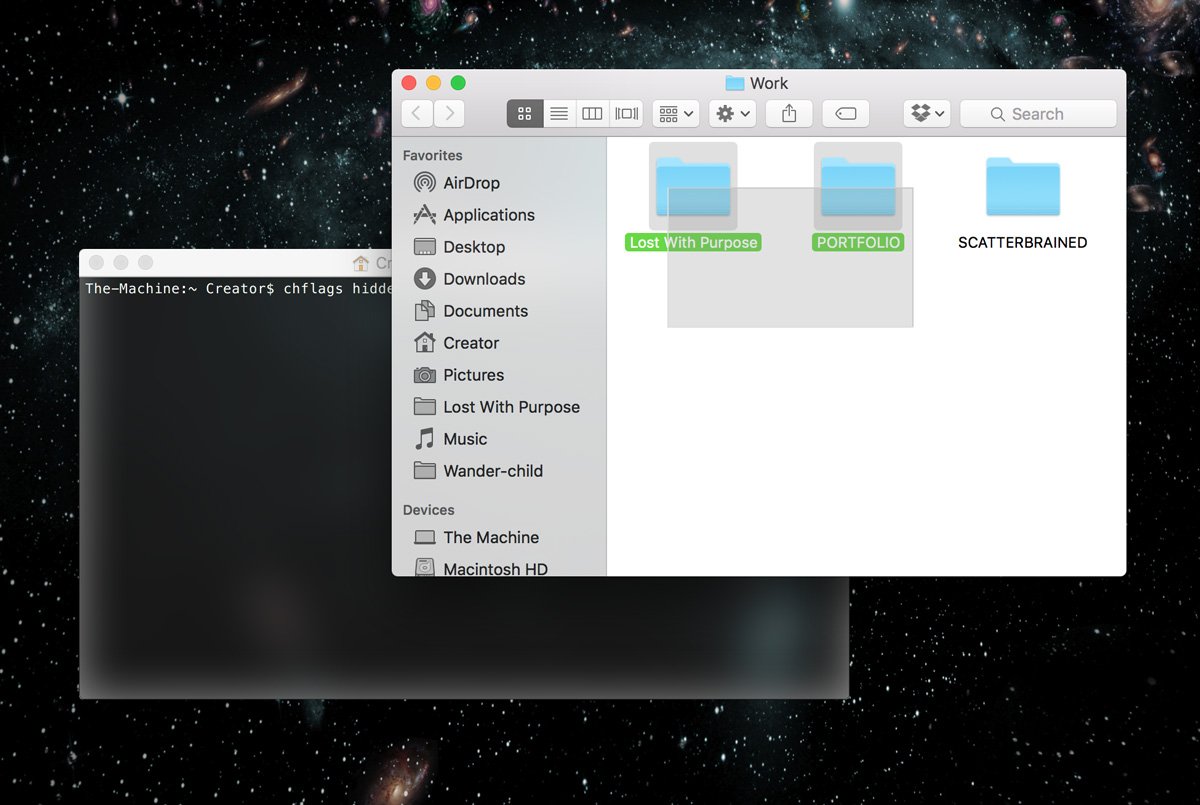
2. Open Finder, and select all of the folders or files that you want to hide. You can select multiple folders/files by holding down the Command key (⌘) while clicking, or doing this step several times. This works for folders on external hard drives as well.
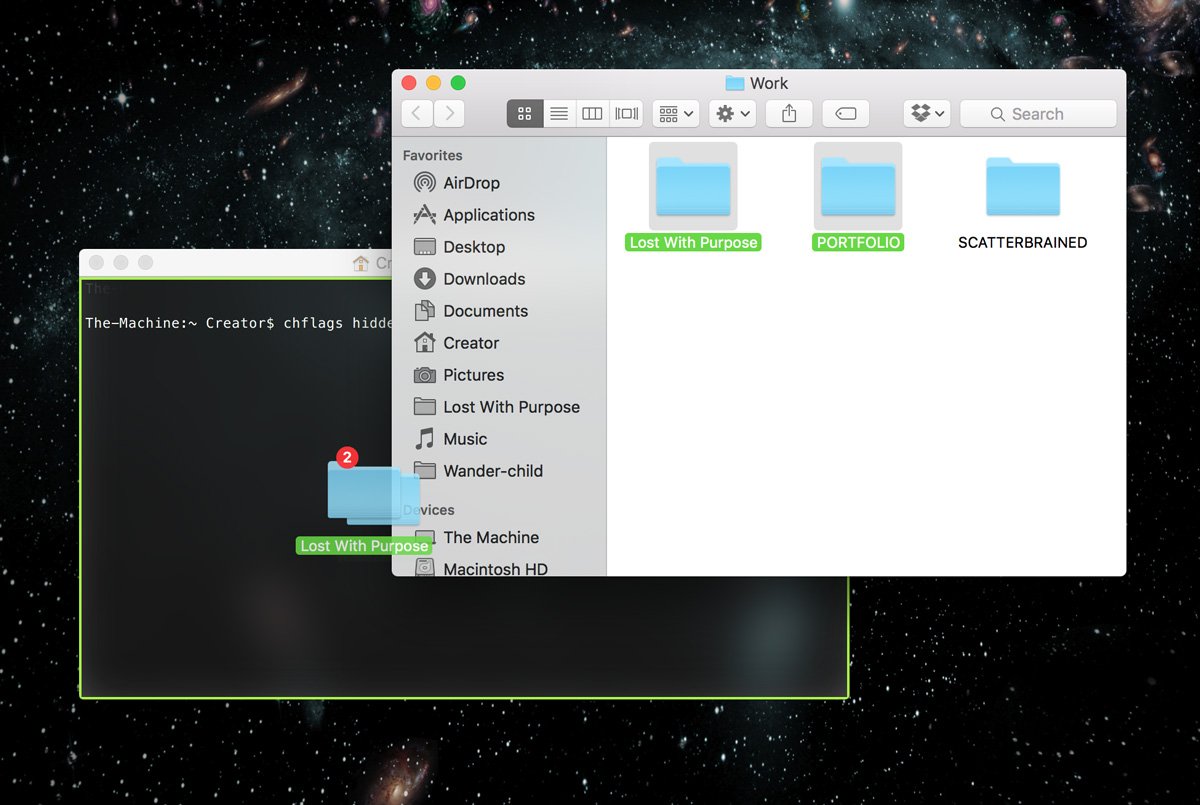
3. Drag and drop the folders to the Terminal window. File “paths” will appear after you do—these show where the files are located on the computer. Remember these paths, you’ll need to know where they are to unhide the files. You can either note them down in some Word document somewhere deep in your files, or write them on a piece of paper somewhere.
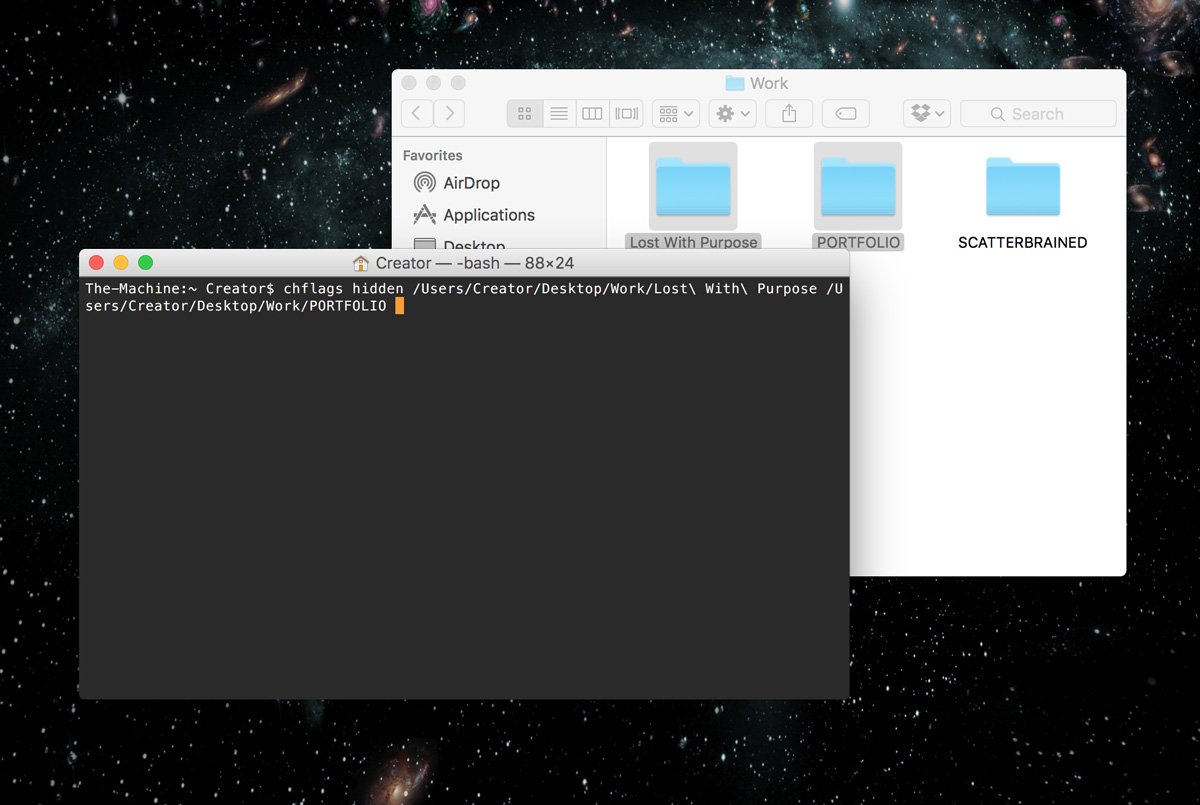
4. Press Return, and voila! Your folders and files are now hidden from the average prying border guard eye.
5. Repeat as necessary until you’ve hidden everything you want to.
Remember to leave some files showing somewhere—it’s suspicious to have an empty computer! Don’t forget to leave some photos up somewhere, ideally in a folder stupidly obvious like “[Country name] vacation photos”. No tourist goes to visit a country without taking a single photo.
Note: This also works for USB devices you can connect to your Macbook, such as external hard drives or USB sticks, as long as they’ll be checked on your/another Mac.
How to unhide (show) files on a Mac
Basically, you need to type in similar commands and file paths as you did to hide your files.
“BUT ALEX,” you may protest, “TYPING THOSE FILE PATHS TAKES FOREVER!”
I feel you, yo.
An easy way to get around that?
1. Open Terminal again, and press your Mac’s up arrow several times. Previous commands you’ve typed will show when you do.
2. Scroll through previous commands until you find the ones used to hide files. Use the left arrow to move the cursor to where it says hidden, and replace that with nohidden.
3. Press Return, and magic! Your files should be visible once more, right where you left them.
4. Repeat as necessary until you’ve shown all your files once more.

Though travel blogging is ruining traveling for Sebastiaan, he still can’t resist bonding with his laptop on the reg 😉
How to hide files on Windows
Hiding and showing files on Windows computers is, luckily, a bit more straightforward than on Mac computers.
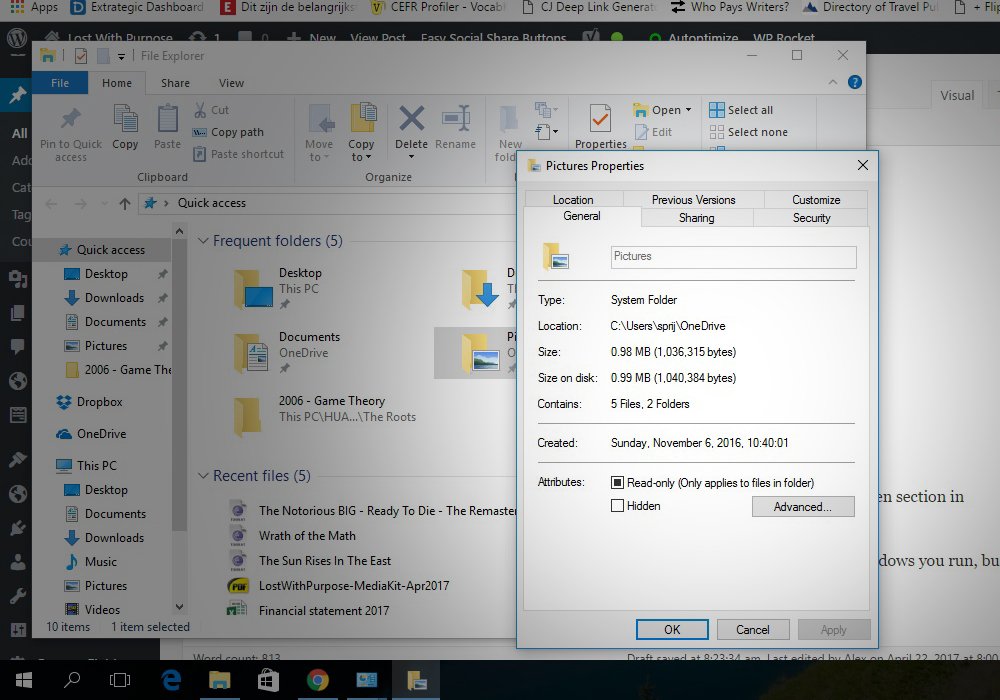
1. Select the files or folders you want to hide.
2. Right-click the file, and choose Properties.
3. Click the General tab.
4. Click the checkbox next to Hidden in the Attributes section.
5. Click Apply.
How to unhide (show) files on Windows
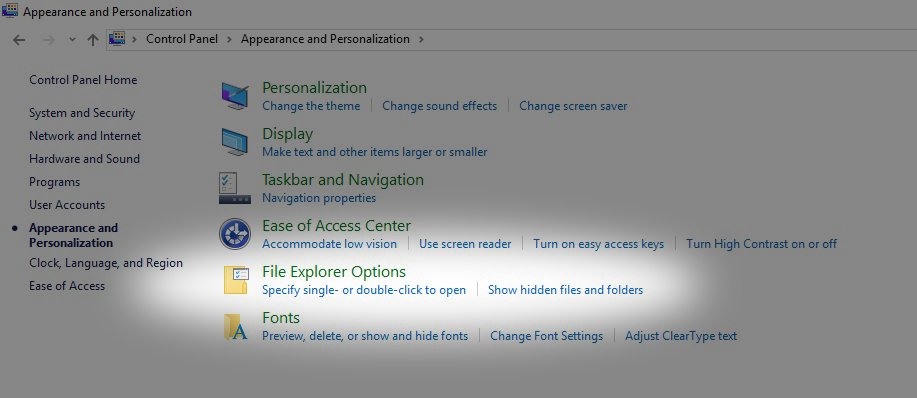
1. Go to Control Panel > Appearance and Personalization.
2. Select Folder or File Explorer Options, then select the View tab.
3. Under Advanced Settings, select Show hidden files, folders, and drives, and then select OK. This will reveal all of the folders and files you’ve hidden before. They’ll look a bit different than your standard files, because they’re still technically hidden.
4. Go to the folder or file you want to restore to normal, follow the same steps as you did to hide it, then untick the Hidden section in Attributes.
Note: the names of the functions might vary slightly depending on which version of Windows you run, but the steps are more or less the same.
Stay safe!
And there you have it: how to hide computer files for border crossings. If you have any questions or need further clarification, you can always contact us or ask in the comments! Don’t worry, we won’t rat you out 😉
Want more about protecting your computer and files while on the road? Read up on why you should always use a VPN while traveling.


Won’t the guards know how to look for hidden files and unhide them?!
They are most definitely not THAT tech savvy at borders!
Until the one border where someone is tech savvy. Then you are in deep trouble with these tricks, discovering you were hiding files will lead to device confiscation / refusal to entry or even worse.
The real answer is, store it in the cloud and redownload.